Thursday, 3 March 2016

carbonara

THE PERFECT SPAGHETTI 

ALLA CARBONARA


At the risk of sounding like a wet blanket, I think that certain dishes deserve to be revered for their sheer perfection and simplicity. Carbonara is one such dish that despite becoming so prolific nearly all over the world, precisely because it is so simple and delicious, it has has nevertheless fallen victim to countless mediocre iterations or as I call them "bastardizations". 

But why fix something that ain't broken? Is it because 'they' are not using quality flavoursome ingredients that bring sufficient flavour to this simple dish? Is it lack of technique? I.e. the erroneous use of cream to create a sauce-like consistency. Or perhaps it is a lack of respect for tradition? Food is a language and language is steeped in culture. It is not merely a label, hence the term 'lost in translation'. Are you still following me? 

Here is some context: Carbonara originated in Rome at a time when much of Rome's populous was poor. They had to make do with the cheapest cuts of meat and a few available ingredients, but above all they had to be tasty. Hence the advent of typical and much loved Roman dishes like Spaghetti alla Carbonara, Bucatini all' Amatriciana, Spaghetti Cacio e Pepe, and Tripa alla Romana just to name a few. 

Roman recipes typically make use of ingredients from the quinto quarto or the "fifth quarter" of the animal, such as offal. Typical quinto quarto dishes are tripe, brain, heart, liver, kidneys, tongue, pancreas, and pig's feet.... just to name a delicious few. Also typical are cured pork's cheek or Guanciale, and cured pork belly or Pancetta which are the central proteins in Carbonara and Amatriciana sauces. 

So where am I going with this? Well, I guess what I am trying to say is that in the absence of context or cultural reference points we lose what makes a dish truly special and meaningful. So given that I am writing this blog from within the Waterloo region or K-W, here are some tips on getting the right ingredients for creating a flavoursome Carbonara:


  • Guanciale /PancettaVincenzo's in Uptown Waterloo (you can also make due with Brandt's Double Smoked bacon from Sobey's)
  • Conestoga Farms Free Run Eggs - Sobey's (these are some of the best eggs I've had; tasty with creamy dark orange yolks)
  • Parmigiano Reggiano - Kitchener Market, Vincenzo's. Just please don't use the pre-grated stuff of unknown origin.                           So now that we have the 'what', here's the "how':

Thursday, 21 January 2016

red cabbage


RUSTIC BRAISED RED CABBAGE TART WITH BLUE CHEESE & WALNUTS


An ideal rustic Winter dish made from seasonal ingredients. The rich flavours of sweet and sour braised red cabbage coupled with walnuts and sharp blue cheese over flaky buttery shortcrust pastry is the epitome of cosy Winter dining.


INGREDIENTS

Shortcrust pastry:
400 g all purpose flour, plus more for dusting
200 g cold butter, cubed
Pinch salt
100 ml cold water

Filling:
1 medium red onion, sliced
half a red cabbage, shredded
3 sprigs fresh thyme
4 TB apple cider vinegar
3 TB good dark balsamic vinegar
Salt and pepper to taste
Walnut halves, 8-10
Crumbled blue cheese to taste

Eggwash : 
Optional -  1 egg yolk & pinch of salt


                                           CLICK PLAY TO SEE HOW IT’S MADE:


Thursday, 10 December 2015

mulled wine / glühwein

GERMAN MULLED WINE OR GLÜHWEIN


This easy and authentic mulled wine recipe brings me back to those dreamy Christmas markets in Germany. Wondering down cobblestone streets with a steaming mug of glühwein, keeping my hands warm and my spirits high whilst  the scent of cloves and cinnamon permeated my nostrils with every indulgent sip.

Glühwein is made for sharing so here I am sharing it with you so you too can enjoy it this Winter after coming in from the cold or better yet, going back into it. Nothing beats a snowy Winter's walk accompanied by a thermus filled with hot fragrant mulled wine to keep you warm and content.

CLICK PLAY BELOW TO SEE A QUICK VIDEO ON HOW IT'S DONE


Friday, 27 November 2015

chocolate, almond + olive oil cake


CHOCOLATE, ALMOND & OLIVE OIL CAKE


This cake recipe is my go-to Winter dessert and I rely heavily on its flavour profile to cajole even non-dessert eaters under joyous submission. Needless to say, this is not an overly complicated dessert but the key to success is in the ingredients. A good balance between the sugar, fleur de sel, and cayenne pepper make for a sophisticated treat while using a fresh high quality extra virgin olive oil imparts rich grassy undertones and a moist texture to this chocolate favourite. And if that weren't enough, its lovely almond nuttiness make it the perfect dessert for the fast approaching holidays.


INGREDIENTS:


METHOD:

1.       Combine 50 g of dark unsweetened good quality cocoa powder with 125 ml of boiling water and a good pinch of cayenne pepper (more if you like heat). Whisk til smooth. Set aside to cool.

2.       In another bowl, combine 150 g of ground almonds with 1 tb all purpose flower, 1/2 tsp baking soda, and a generous pinch of fleur de sel (or sea salt). Stir well.

3.       In a third bowl, combine 180 g of sugar with 3 eggs. Whisk until incorporated. Gradually pour in 150 ml of the extra virgin olive oil in a steady stream, whisking all the while. This will create a thick and emulsified rich yellow batter.

4.       Combine the chocolate batter with the egg and olive oil batter. Whisk to combine.

5.       Now combine this batter with the ground almond mixture. Stir to combine.

6.       Pour cake batter into a fully lined (bottom and sides) baking tin. At this point you may top cake with blanched almonds for decor, then bake for 45 minutes in a 325 degree oven.

7.       Let cool for at least 30 minutes before digging in. If you like you can dress the cake with a sprinkle of fleur de sel and a dusting of icing sugar. Serve with a dollop of whipped cream.


Monday, 18 May 2015

stinging nettles

NETTLE PURÉE 


Spring is the perfect time to go out into nature and forage for delicious greens to cook up, and there is nothing more green, delicious, and healthful than nettles. 

Here's how to pick nettles and make your very own nettle purèe to enjoy with seafood, chicken, eggs and even bacon. Nettle is incredible!

https://www.youtube.com/watch?v=UmIr5hwy8OM

Thursday, 30 April 2015

lavender

PANNA COTTA WITH LAVENDER & HONEY 


Panna Cotta (Italian for cooked cream) with lavender and honey is the most refreshing way to end a meal. With its silky texture and delicate flavour of lavender infused cream, you won't believe it only takes minutes to prepare! The perfect dessert for warm summer evenings.


Here's the how-to YouTube video on how to make this exquisite dessert using fresh lavender, honey, cream and gelatin. It can't get easier than this!

Tuesday, 21 April 2015

quark

GERMAN CHEESECAKE OR KÄSEKUCHEN


Whether you're a fan of cheesecake or not this authentic German cheesecake (or Käsekuchen) will certainly not disappoint. This IS the real deal! 

Unlike its North American counterpart, it contains Quark (a creamy and mildly tangy fresh cheese) so it is always light and flavourful and never stodgy or dense. Secondly, instead of a cookie crumble base there is a buttery and decadent shortcrust pastry crust that renders this dessert a sheer delight. 


Guten Appetit!
QUARK - a fresh unripened curd cheese
TIP: Why not add cherries or raisins to your filling?


Saturday, 4 April 2015

raspberries


FINANCIERS AUX FRAMBOISES or MINI ALMOND CAKES WITH RASPBERRIES

These classic French pastries are as delightful to eat as they are to make. Its 3 key ingredients are ground almonds, butter, and raspberries. It takes around 10 minutes to prepare plus 10 minutes in the oven but the result will have you thinking you've just stepped into a Parisian patisserie. 


Makes 24-30 mini cakes

Wednesday, 25 March 2015

octopus

GALICIAN STYLE OCTOPUS OR PULPO A LA GALLEGA

This quick and rustic octopus dish is an incredibly delicious way of  enjoying the taste, texture, and tradition of Galician octopus. Set over a base of boiled potatoes and dressed in plenty of paprika and olive oil, it makes for a special lunch, tapa, or appetizer. 


Click on video to see how it's done:


Click on video link to see how it's done:


Friday, 13 March 2015

anchovies

ANCHOVY, LIME & CAPER PASTA

I think that Italian cooking has the potential to be the perfect "fast food" and this pasta dish is no exception. It packs a ton of flavour, it is healthy, and it takes under 15 minutes to prepare!
The perfect meal for a busy weekday supper. Check out the recipe below on YouTube:


Thursday, 26 February 2015

yoghurt


OOEY GOOEY YOGHURT DONUTS


How to make the most exquisite yogurt filled donuts simply and quickly. Crispy on the outside, luscious and creamy on the inside.


Wednesday, 25 February 2015

dark chocolate

MOLTEN CHOCOLATE CUPS


This decadent and lightly spiced dessert will make a chocoholic out of anyone. So next time you want to impress and entice, make these spectacular chocolate cups in just under 20 minutes. 


Thursday, 19 February 2015

crepe

GALETTE COMPLÈTE 

(ham, egg & cheese crepe)


My version of the Galette Complète is perfect for a lazy morning or special brunch. Ham, cheese, and egg all nestled inside a fluffy buttery crepe is a fabulous way to begin the day.

Tuesday, 23 December 2014

christmas cookies - part III


HAZELNUT BUTTONS/HASELNUSS KNOEPFEN


This is probably the easiest and quickest Christmas cookie recipe you will ever take on but it’s also quite possibly the most delicious. This recipe was given to me years ago by a no-nonsense German grandmother and it’s served me well since. The only amendment I’ve made was to utilize a mix of hazelnuts and walnuts but this is optional. So why go nuts with all that holiday baking this year when you can bake those nuts, that’ll show’em! 


INGREDIENTS:
makes about 20 cookies

200 g softened butter
200 g sugar
2 packets vanilla sugar
2 eggs
200 g chopped Hazelnuts (or a mix of Hazelnuts and Walnuts), plus 20 whole hazelnuts for decoration
200 g oat flakes (quick oats work best, do not use whole oats or steel-cut)
4 Tb flour
4 Tb rum
2 packets baking powder


METHOD:
  1. Preheat oven to 390 F
  2. In a bowl, whisk together butter, sugar, vanilla sugar, and eggs until well incorporated
  3. To this add the chopped nuts (I like them to be chunky but not too large so I use a mortar and pestle or a rolling pin to get the consistency I want), stir with a wooden spoon
  4. Add the oat flakes, stir
  5. Finally add the flour, rum, and baking powder and stir until well incorporated
  6. Line a baking sheet with parchment paper then using a teaspoon scoop up the mixture and spoon onto the sheet making sure there is at least 2 inches between each as they spread out. Place a whole hazelnut in the centre of each cookie
  7. Bake in oven for 10 minutes or until the sides of the cookies just begin to turn golden brown – you may only need 8 minutes in the oven


Friday, 19 December 2014

christmas cookies - part II

PFEFFERKUCHEN


 As I said in an earlier post, when it comes to Christmas, I am all about German cookies. If you are a traditionalist like me you will surely appreciate this old classic: Pfefferkuchen (also known as Lebkuchen and is similar to gingerbread).  I’m being quite literal here when I say “old classic” because Lebkuchen was invented by monks in Franconia, Germany in the 13th century.


The reason I love this treat so much, besides its seven hundred year plus history, is because it’s full of wonderful aromatic spices and honey, and it goes a really long way. I find myself having a couple of these with my morning coffee or afternoon tea for weeks after Christmas as they keep well and are not sickly sweet. Also, they are perfect for dunking!

So here is an oldie but goodie, the wonderfully fragrant Pfferkuchen:


INGREDIENTS:
makes around 60

140 g butter
175 g sugar
400 g honey
1 ¾ Tb. dark unsweetened cacao powder
1 ½ Tb. ground cinnamon
1 Tb. ground coriander seed
1 ½ tsp. ground cloves
1 tsp. ground ginger
1 tsp. ground aniseed
1 tsp. dried lemon peel
¾ tsp. ground cardamom
½ tsp. ground allspice
¼ tsp. nutmeg
840 g all -purpose flour
11 g baking powder (or ¾ of a packet)
2 eggs
nuts for garnishing (blanched whole almonds, whole hazelnuts, or walnut halves)
1 tsp. milk

METHOD:
  1. In a medium sauce pan melt the butter on medium low heat
  2. While whisking, add in the cacao and sugar, followed by the honey. This should result in a very glossy smooth texture
  3. Turn up the heat to medium and throw in the spices. Cook for a couple of minutes. Remove from heat and allow to cool
  4. In a large bowl, add the baking powder and flour
  5. In a separate dish, break the eggs and whisk lightly. Pour ¾ of the eggs into the bowl and put the rest in refrigerator for egg-washing your cookies later
  6. Pour in the cooled down honey and spice mixture
  7. Using a mixer, whisk the ingredients together so that they are evenly incorporated. The mixture should resemble clumpy wet sand
  8. Using your hands bring the mixture together until it begins to bind then divide into four sections, about a large handful each
  9. On a lean flat surface, knead each section of dough into a smooth round ball. Be prepared to spend a good 5-7 minutes kneading each section, it’s a good workout! You should end up with four smooth round large balls which you will cover with cling wrap and leave in the refrigerator overnight to rest
  10. The next day, take out a ball of dough and roll it out on a clean flat surface. To ensure the dough does not stick to your surface, I suggest you roll it out on a sheet of parchment paper. Get ready for another good arm workout
  11. You can roll out the sheet as think or as thin as you like, you merely need to adjust the cooking time.  I like to mix it up. Just ensure you bake similar sized cookies at the same time.
  12. Preheat oven to 390 F
  13. Using a cookie cutter, cut out desired shapes or create a freehand shape with a sharp pairing knife
  14. Add a splash of milk to the eggs that you left in the refrigerator and whisk
  15. Top the cookies with a nut or nuts in whatever design that you prefer, then using a brush, give the surface of the cookies an egg wash
  16. Line baking sheet with parchment paper then set your cookies on it about 1.5 inches apart
  17. Bake for 8 minutes for thinner cookies or 10 minutes for thicker ones
  18. Let cool on a rack
  19. Don’t be shocked by how hard your Pfefferkuchen is, it’s completely normal. Just place them in a cookie tin with the lid on but not completely fastened. They should be nice and soft the next day
Perfect for dunking!

Tuesday, 16 December 2014

christmas cookies

    SPITZBUBEN / GERMAN

 JAM SANDWICH COOKIES 


Christmas is just around the corner and it’s time to start baking those sweet and decadent desserts.  For me Christmas is very much about tradition which is why my personal go-to inspiration for holiday baking is invariably German. Germans have such an admirable tradition when it comes to Christmas sweets and I for one am a BIG fan. This year I'm kicking off the baking marathon with the beautifully dainty Spitzbuben. You will surely recognize these jam sandwich cookies but I will show you how to make them so that they are flavourful and never dry.

INGREDIENTS:
makes 28 sandwich cookies
  • 2 heaping cups all-purpose flour
  • 1 heaping cup ground almonds
  • 1 cup icing sugar
  • 1 pinch of salt
  • 1 egg
  • 2 tsp. vanilla extract
  • 200g butter, cold and cut into small pieces
  • 1/2 cup raspberry jam, or other red jam
  • 1 tsp. brandy, or other fruit liqueur
  • icing sugar for dusting


METHOD:
1.       Using large bowl, bring together flour, ground almonds, sugar, and salt
2.       In small cup, lightly whisk egg then add in the vanilla extract. Pour mixture over the dry ingredients
3.       Add cubed butter to dry ingredients then using your hands, work the butter into the flour until you get a breadcrumb-like consistency. Work the dough a bit more until it begins to come together but do not overwork it
4.       Form the dough into a disc, wrap in cling wrap, and place in refrigerator for 2 hours
5.       Preheat oven to 350 F
6.       On a lightly floured surface, roll out the dough into about half a centimetre sheet. Cut out desired shape using a cookie cutter. Keep re-rolling dough until finished.
7.       Using an apple corer, a very small cookie cutter, or a bottle cap, cut out the centre of half the cookies
8.       Place cookies on a baking sheet lined with parchment paper and bake for 10-12 minutes or until slightly golden. Let cool
9.       Meanwhile in a small bowl, stir brandy or a fruit liqueur into your preferred jam.  Raspberry is ideal but I like to mix it up and use sour cherry jam or a white current and cardamom jam
10.   Place about half a teaspoon of the jam mixture on the underside of a cookie then press it together with one of the cookies with the centers cut out.
11.   Leave to cool then dust with icing sugar

TIP: The cookies keep well for days in an airtight container


Monday, 8 December 2014

bone marrow

WINE BRAISED BRISKET AND OXTAIL ON ROASTED BONE MARROW


I think there is something about bone marrow that connects us to a very primal part of ourselves.  Some anthropologists believe that in some parts of the world early humans were scavengers rather than hunters and bone marrow would have supplied the large brains of us tool-using hominids with much needed fat.

Be that as it may, I like to indulge myself in primal activity now and then and what could be more indulgent than the exquisite, fatty and nutty bone marrow? However, as if the bone marrow weren't enough of an indulgence, I like to smother it with red wine braised beef brisket and oxtail. I promise you that this will be one of the most memorable dishes you will ever enjoy, right down to the last drop of marrow as you will surely wiggle your tongue along every crevice of your boat-shaped bone in pursuit of it. I took a photo of a friend of mine getting right amongst it like a Cro-Magnon and I have to say, it was an image to remember. 

The great thing about living in an area with access to farms with their own country meat stores is that you can ask for the cuts of meat you want. This ensures that the next time the cattle goes to the abattoir, part of it has your name on it and you will get the freshest cuts from a small herd of local organically raised animals. What can be better that that?

A good rapport with your local butcher is particularly handy when it comes to preparing this dish as you will need to ask for the shin bone to get sliced lengthwise. I tend to put my order in at Oakridge Acres http://www.oakridgeacres.ca/ because their meat is outstanding. The cattle are fed mostly grass/hay as well as non GMO barley. This is some of the best tasting meat I have ever had and I’ll look for any excuse to drive down to Ayr to pick up my order.

WINE BRAISED BRISKET AND OXTAIL ON ROASTED BONE MARROW

INGREDIENTS:
Serves 4

2 Tb. olive oil
Salt and pepper
4 beef shin bones cut lengthwise
400 g beef brisket
300 g oxtail
1 small onion, finely chopped
1 large carrots, finely chopped
1 celery stalk, finely chopped
2/3 bottle red wine
1 cup tomato passata
1 sprig of thyme
Parsley, finely chopped
Lemon rind, grated 

METHOD:
  1. Preheat oven to 325 F
  2. First start off by seasoning the brisket and oxtail amply with salt and pepper
  3. Heat up the olive oil in a deep cast iron pan or pot on medium high heat
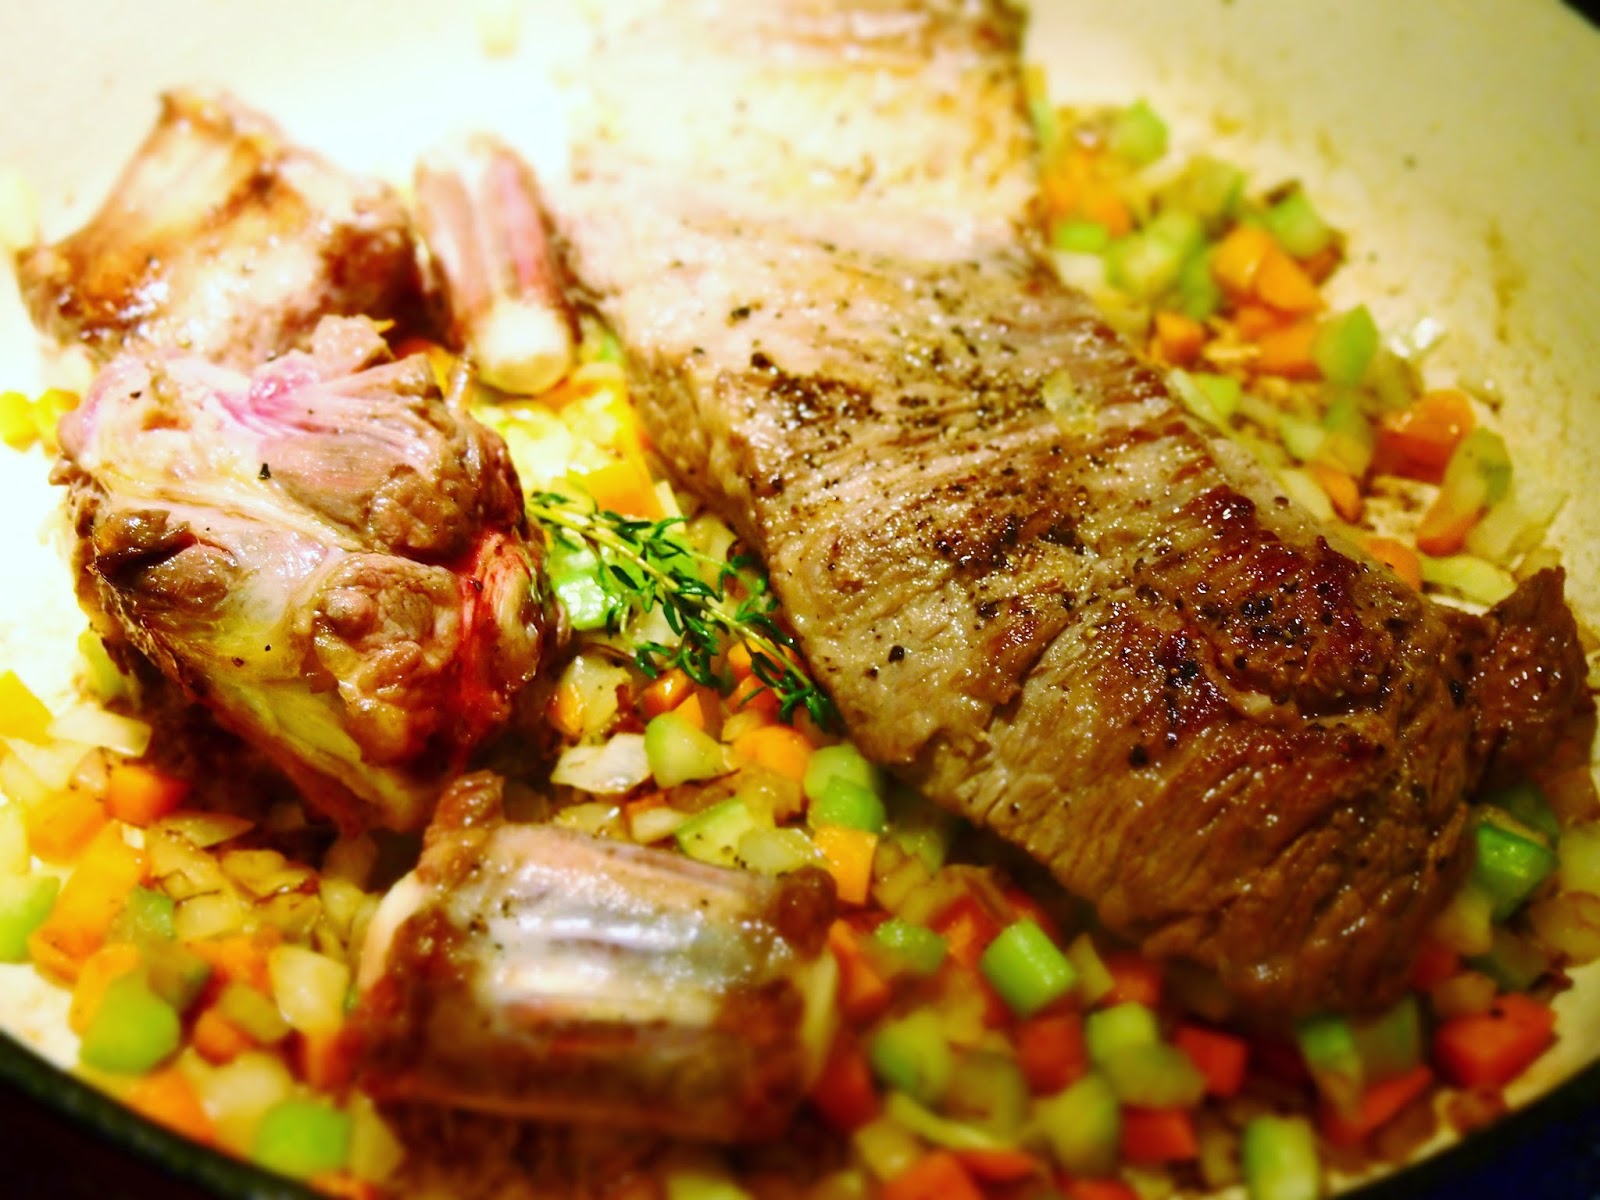
  4. Sear the meat on all sides until brown
  5. Remove meat, set aside
  6. Throw in the onions, carrots, celery, and thyme sprig and cook for a 3 minutes
  7. Place the meat back in then pour in the red wine followed by the tomato passata
  8. Let it come to a simmer then cover with lid and place in oven to cook for 3 hours
  9. Remove pan or pot from the oven. The meat should be extremely tender. Using two forks shred the meat up and stir it into the sauce so the meat gets completely incorporated into that lovely dark red braising liquid. Cover and set aside.
  10. Turn the oven up to 420 F
  11. Lay the bones marrow side up on a baking sheet, season with salt and pepper and bake for 10-15 minutes. Once the marrow begins to soften and bubble, remove it from the oven
  12. Pile on the shredded braised beef on the bone marrow then sprinkle with the chopped parsley and lemon rind for a punch of colour and freshness
  13. Serve with a nice mash as I did or with a couple of golden buttery slices of toast for scooping up that marrowy goodness
TIP: The brilliance of this dish comes out when you get the braised meat and the bone marrow in the same mouthful. The sweet nuttiness of the marrow along with the rich savouriness of the braised meat is out of this world.


Tuesday, 18 November 2014

sour cherries

                                                  SOUR CHERRY LIQUEUR

There is something so rewarding about drinking your own homemade booze. Though I have yet to taste a good home made wine, there are some things of an alcoholic persuasion that taste best when made at home. Where I come from it’s the infamous plum brandy that comes to mind.  The other favourite is a sweet and flavourful sour cherry liqueur which is enjoyed after a meal like a dessert wine or on its own. The first time I tried it I must have been around 3 or 4 years old! We had guests over for dinner and as my parents were seeing everyone out at the front door, unbeknownst to them,  I made my rounds finishing each and every remaining drop of liqueur that the guests had left behind in their glasses. I then climbed on the couch and proceeded to give an enthusiastic rendition of ABBA’s Gimmie Gimmie Gimmie (A Man After Midnight). How’s that for an image?

Growing up it was my grandfather who made this drink and it was absolutely delicious. For the past couple of years I started making it as well because I missed the smell and taste of this nectar of the gods. Normally it’s made with pure alcohol but this being Ontario, finding pure alcohol is out of the question. So I use the next best thing, vodka. Come every July I seek out the ripest sour cherries I can find to make my batch however, this past July I decided to take a drive to the Niagara region to pick my own so I can milk every ounce of authenticity out of the experience, such a purist I am.

Just a bit of a warning though: if you are a person who requires immediate gratification, this may not be the drink for you as it requires  about 10 weeks of cellaring. On the bright side, it should be ready to drink just as the weather begins to get nippy. Think of it as a gift for future you, who probably really needs something sweet and strong to warm up those dark and cold days or wants to break out into a rendition of an old ABBA classic.

SOUR CHERRY LIQUEUR 
Ingredients: 
2 kg sour cherries, washed and dried (stems off, pits included)
800 g white sugar
3 L vodka

Method:
  1. First, choose the ripest sour cherries you can find, the darker the better.
  2. Wash and dry them with stems still on. I like to spread them on paper towels to let them air dry outside gently. De-stem the cherries after they are dried.
  3. In a large glass demijohn, pour in enough cherries to cover the bottom of the jar, cover them in a layer of sugar on top, follow this by another layer of cherries and sugar. Continue layering the cherries and sugar until finished making sure the last layer of cherries is covered by sugar.
  4. Cover the mouth of the demijohn with gauze and secure with an elastic. The reason for this is so that the fruit can breathe whilst ensuring the insects are kept out.
  5. Leave out in the sun to macerate for at least 4 days until the sugar is fully dissolved, and the dark red juices from the cherries have seeped out.
  6. Now it’s time to pour in the vodka. Roll bottle around gently in your hands so everything is evenly incorporated.
  7. Close the demijohn with a cork and place in a dark cool room for at least 10 weeks. Occasionally roll the bottle around to give things a bit of a mix.
  8. Once the end of October rolls around  it’s time to reap the rewards of this aromatic and sweet treat. You’re welcome!

Sour cherries are smaller and more translucent than regular cherries, and have a unique texture
Maceration


TIP:  Don’t throw away those plump vodka-infused sour cherries!They are great in desserts and can last a long time in your freezer ready to use next time you want to bake dessert.